 |
| Skirt: Hand-me-down $0.00. Top: Thrift store: $1.00. Cardigan: Hand-me-down $0.00. Tights: Hand-me-down $0.00 Shoes: Hand-me-downs. |


 |
| Necklace: Gift $0.00. |

|
| Skirt: Hand-me-down $0.00. Top: Thrift store: $1.00. Cardigan: Hand-me-down $0.00. Tights: Hand-me-down $0.00 Shoes: Hand-me-downs. |
|
| Necklace: Gift $0.00. |
 |
| Today I'm going to show you how to make a cowl scarf with a floral stripe . If you like the look of just one color better, it's really easy to just leave the stripe out. This is a pretty easy, and quick project to do. |
 |
| The first thing you need to do is cut your fabric into rectangles. You can adjust the measurements to however thick or long you want it. For mine, I cut the large piece of fabric to be 39" by 46", and the floral stripe is 39" by 6". |
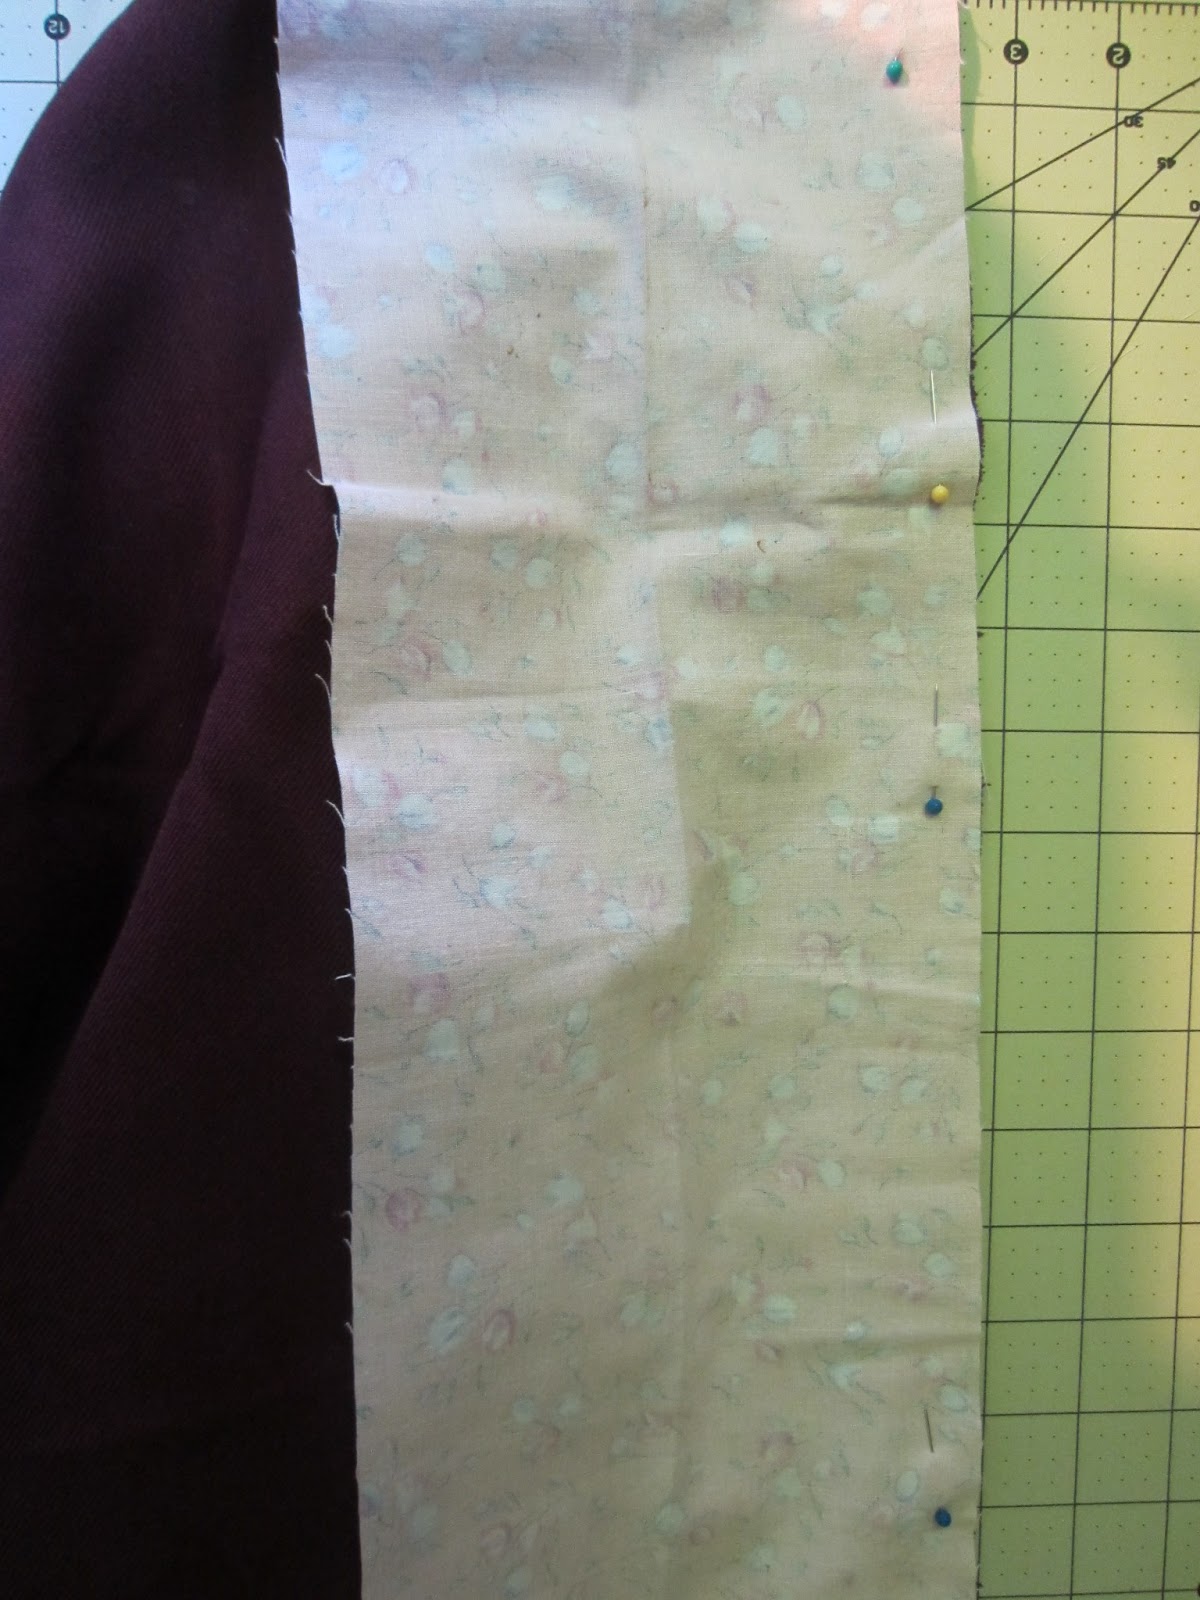 |
| Next pin the floral stripe like so , to both sides of the large piece of fabric. |
 |
| Then sew it up on both sides. |
 |
| You should have a big tube. Now your going to want to iron the seams flat. |


 |
| Turn it right side out. |
 |
| This part gets a little tricky. Take the seams from both sides and pin. You really only need one pin. |
 |
| Sew it up, matching up the fabric as you do. |
 |
| Now you should get to a point where the scarf is half inside out, and half right side out. At this point, back stitch and cut off the loose threads. |
 |
| Now your going to want to pull it until your scarf is all right side out. |
 |
| There's going to be an opening. |

 |
| Just sew the opening shut, and your done! Not to bad right? I hope you liked this tutorial. Have a great day! -Zoe |


 |
| The first thing you will need to do is measure your book (they will be different for every book), then cut out a large rectangle and two smaller rectangles, according to your measurements. Don't forget seam allowance. |
 |
| Next hem up the long sides of the large piece. |
 |
| And the long sides of the smaller pieces. |
 |
| This is optional but I added some flare by sewing on some trim. |
 |
| Then pin the pieces right sides together, and sew. |
 |
| Cut the corners. |
 |
| Then turn right side out, and put it on your book. |
 |
| Just a note, this will be very difficult to get on a hard cover book. |
 |
| I hope you've enjoyed this tutorial. Have a great day! |
 |
| Dress:The dress I'm wearing is one that a made out of a t-shirt and a bed sheet $0.00. |
 |
| I'm wearing and Essie nail polish called Turquoise & Caicos $6.00. The pink is a Piggy Paint polish in Angel Kisses $4.00 (for a two pack). (I may do a tutorial on ombre nails. Let me know in a comment if you would like to see that.) |
 |
| Necklace: Garage sale $0.50 |

 |
| Shoes: Walmart $10.00. |


 |
| Recently I sold this necklace/scarf on Etsy. I made it from a 100% cotton T-shirt and a vintage button. This one is a little different from the T-shirt scarfs I've made in the past because of the way I tied the fringe and the bold red. I feel like it's more edgy then previous designs. |


 |
| This is the necklace/scarf I made last year, and it also sold. In fact every one I've ever made has sold. I think it's because the way I make these is a little different from others I've seen on Etsy. I will certainly make more in the future. |
 |
| This is my gorgeous customer Meg. She bought this scarf for her brothers girlfriend. (If your reading this) Hi Meg, it was an absolute pleasure doing business with you! |
 |
| The other day I saw these photos on Google image. I thought it was a really cool idea to incorporate large beads, to give that boho feel. |
 |
| So what do you think of T-shirt necklace/scarves? What kind are your favorite, and how would/do you wear them? Leave a comment telling me. Have a great day!-Zoe Pease |
 |
| Todays DIY is for this native American inspired wrap bracelet, with a leather, horse button from a vintage tweed blazer. |
 |
| For this you will need friendship thread (embroidery thread), beads (I got these at Walmart), and your button of choice. |
 |
| Wrap your thread around your wrist to see how long it needs to be. Make sure to add a few extra inches for the loop and the button. I cut my string at 36 inches. |
 |
| Tie a loop at one end. It needs to be big enough for your button to fit through. |
 |
| Begin beading. |
 |
| Once you've beaded to the end, tie on your button and snip the extra. Wrap it around your wrist and put the button through the loop. I like to wear mine with my watch. Leave me a comment letting me know what you think. Have a great day! |